Installation Guide Oracle 10g Grid control (Oracle Enterprise Manager Grid Control 10g Release 3 설치하기 )
Purpose
- Vmvare로 Grid control을 설치하는 방법에 대한 가이드를 제공한다.
시나리오
EMREP 이름으로 DB를 생성하시오 (EMREP DB는 Grid Control의 repository 로 활용됩니다.)
Grid Control을 설치하시오.
Grid Control에 사용되는 DB 로는 EMREP를 사용하시오.
(사용자 이름은 sysman/emadmin1으로 하시오)
Oracle Enterprise Manager Grid Control 10g Release 3 설치하기
Oracle Enterprise Manager Grid Control 10g Release 3의 설치 과정은 크게 두 단계로 구분됩니다.
먼저 OEM Grid Control 10g Release 2를 설치하고 다음으로 Release 2를 Release 3로 업그레이드합니다.
(Release 3를 바로 설치하는 것은 불가능합니다.)
OTN에서 Oracle Enterprise Manager Grid Control 10g Release 2를 다운로드한 후 압축을 풉니다.
cd grid10gR2
unzip Linux_Grid_Control_full_102010_disk1.zip
unzip Linux_Grid_Control_full_102010_disk2.zip
unzip Linux_Grid_Control_full_102010_disk3.zip
다음으로 Oracle Enterprise Manager Grid Control 10g Release 3 업그레이드 배포본을 저장할 디렉토리를 생성합니다.
mkdir grid10gR3
Oracle Enterprise Manager Grid Control 10g Release 3를 OTN에서 다운로드한 다음 압축을 풉니다.
cd grid10gR3
unzip GridControl_10.2.0.3_Linux.zip
Enterprise Manager Grid Control 소프트웨어의 설치
oracle 계정으로 로그인합니다.
[oracle@grid ~]$ cd /u01/app/oracle/
[oracle@grid oracle]$ ls
grid10gR2  grid10gR3
[oracle@grid oracle]$ cd grid10gR2
[oracle@grid grid10gR2]$ ls
dcommon  index.htm  libskgxn  rdbms     runInstaller
doc      install    oms       response  stage
[oracle@grid grid10gR2]$ ./runInstaller
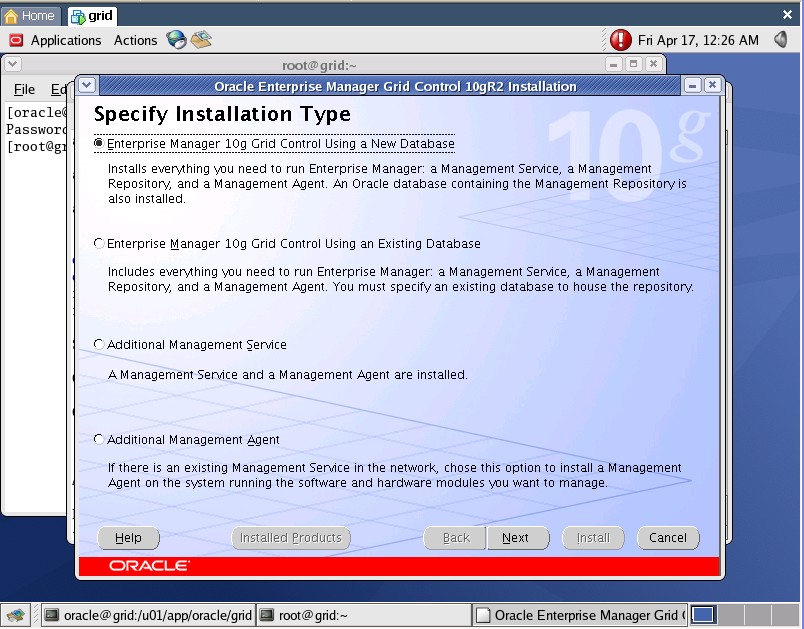
1. Specify Installation Type
Enterprise Manager 10g Grid Control Using a New Database를 선택합니다.
Next를 클릭합니다.
2. Specify Installation Location
Parent Directory: /u01/app/oracle
Next를 클릭합니다.
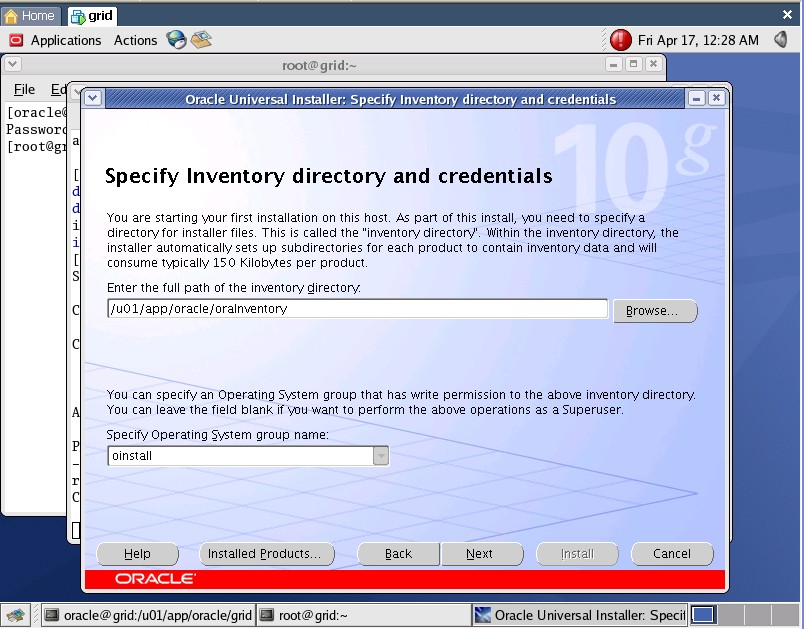
3. Specify Inventory Directory and Credentials
Inventory Directory: /u01/app/oracle/oraInventory
Operating System group name: oinstall
Next를 클릭합니다.
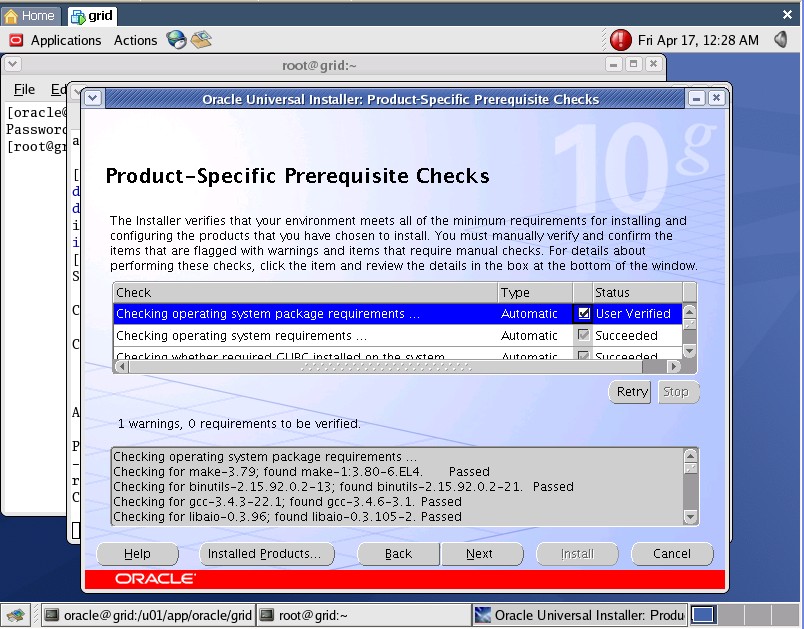
Product-specific Prerequisite Checks
Warning이 표시되고 있다면, Type, Status 컬럼 사이에 있는 체크박스를 클릭합니다.
Status가 User Verified로 변경되고, 다음 단계로 진행할 수 있게 될 것입니다.
(보통 패키지에서 3개가 fail이 납니다.. 인스톨되지 않았다고..
그런데 인스톨을해도 fail이나며 그외에것이
fail 난다면 패키지를 다시 설치해주셔야합니다 .(인터넷 검색해보니 어떤이는 버그라고 하더군요)
또 sysctl.conf 같은 파일에 값을 잘못설정해주시면 설치가 되지 않습니다.)
이부분에서 체킹된 메시지를 한번 읽어 보시는 것이 좋습니다.
Next를 클릭합니다.
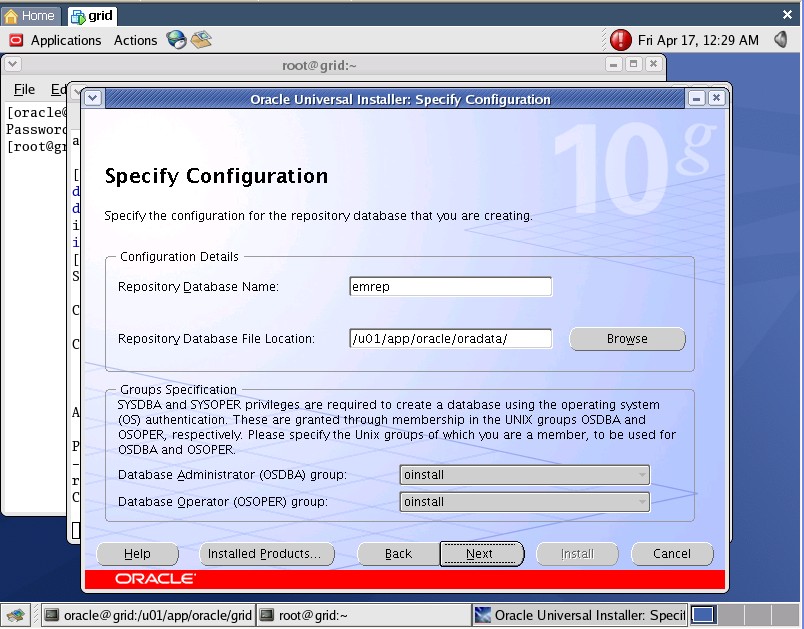
5. Specify Configuration
필요한 경우, Database Administrator (OSDBA) 그룹과 Database Operator (OSOPER) 그룹을 oinstall로 변경합니다.
Next를 클릭합니다.
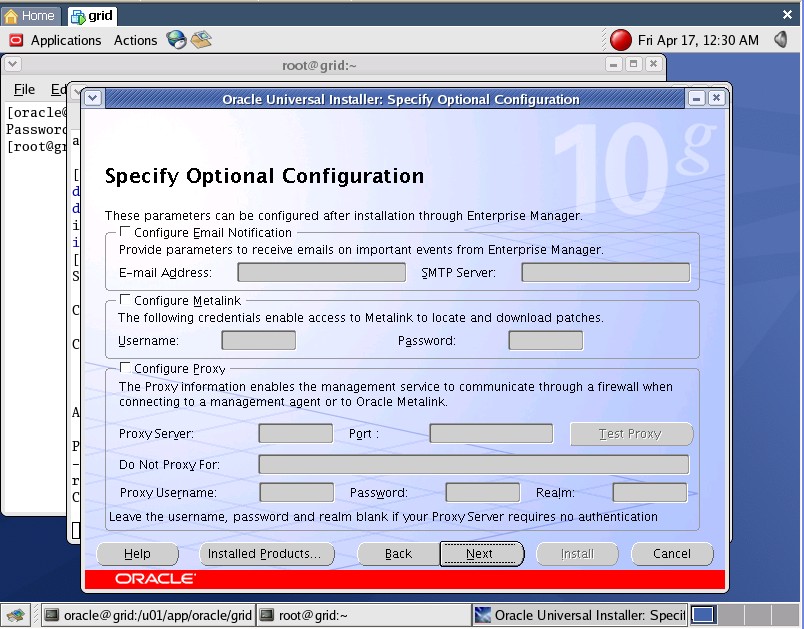
6. Specify Optional Configuration
메타링크 아이디가 있으시면 입력해주시면 됩니다 (저는 없어서 ..)
Next를 클릭합니다.
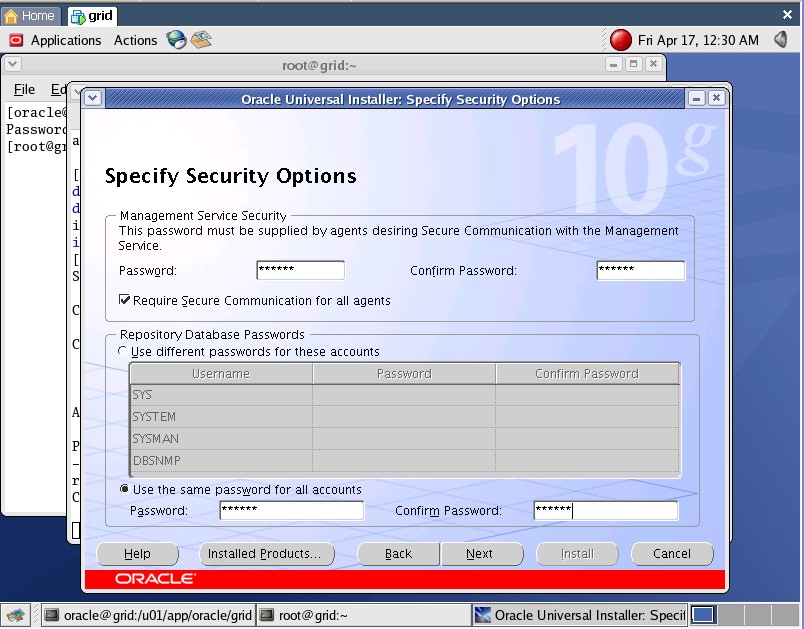
7. Specify Security Options
Management Service Security 패스워드를 반복 입력합니다.(oracle1 :숫자가 들어가야합니다)
Repository Database Passwords 패스워드를 반복 입력합니다.
(나머지는 그냥 oracle1 ,sysman은 문제에 emadmin1 로 설정하라고해서 이것만 emadmin1)
Next를 클릭합니다.
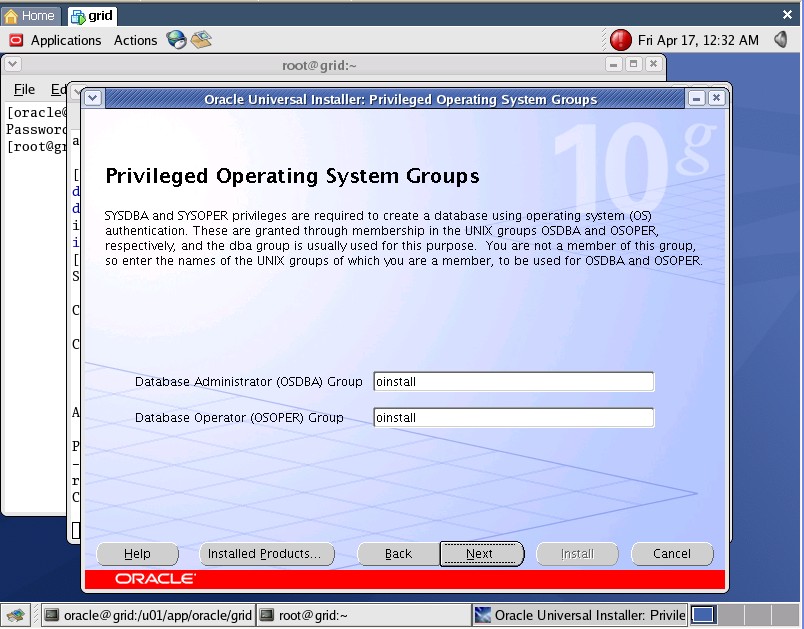
8. Privileged Operating System Groups
필요한 경우, Database Administrator (OSDBA) 그룹과 Database Operator (OSOPER) 그룹을 oinstall로 변경합니다.
Next를 클릭합니다.
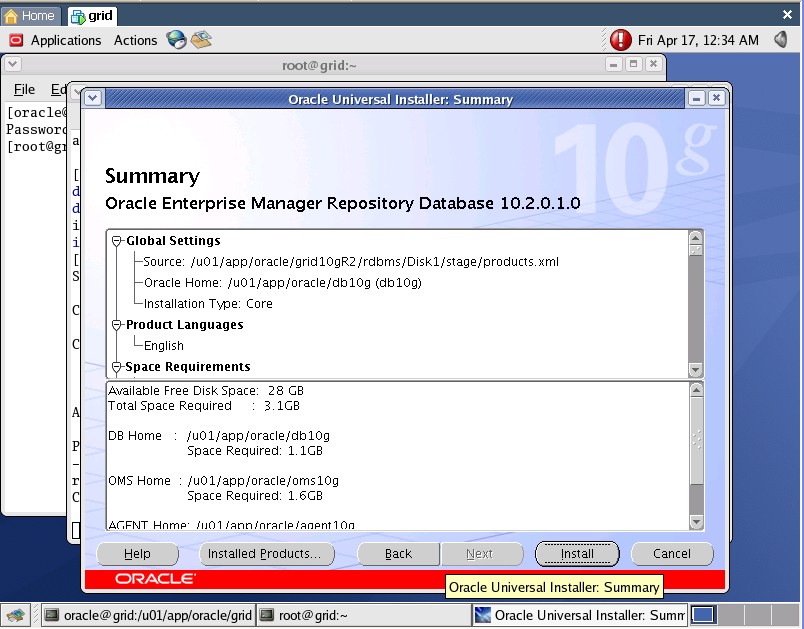
9. Summary
Install를 클릭합니다.
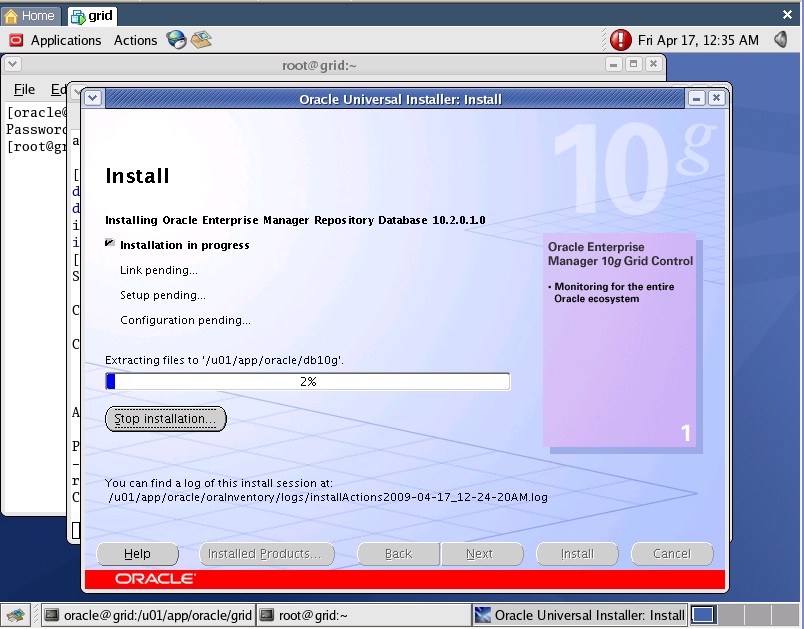
10. Install
Oracle Universal Installer가 아래 3 가지 제품을 설치합니다. 이 과정에서 사용자가 수행할 작업은 없습니다.
Oracle Database
Oracle Management Service
Oracle Management Agent
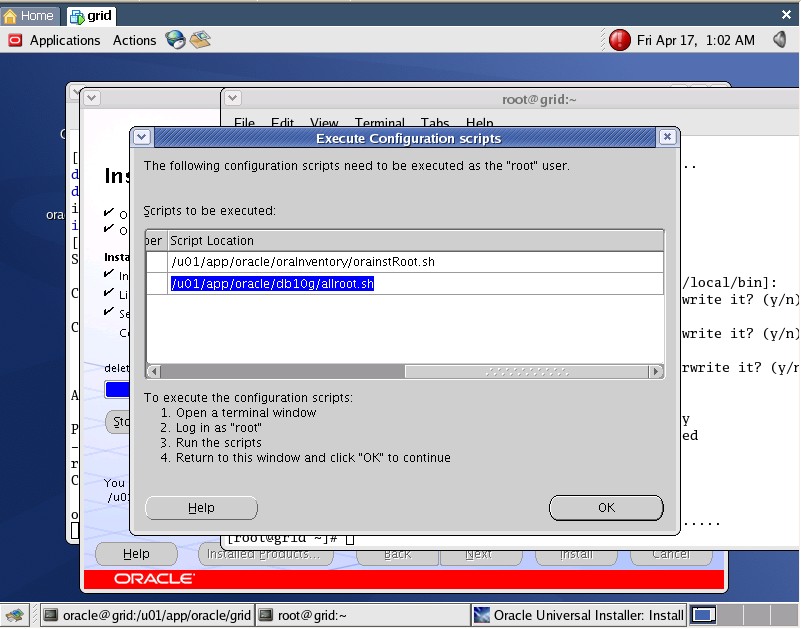
11. Execute Configuration Scripts
설치가 완료되면, 스크립트가 root 계정으로 실행되어야 한다는 메시지가 팝업 창으로 표시됩니다.
root로 로그인하여 명시된 스크립트를 실행합니다.
실행이 완료되면 OK를 클릭합니다.
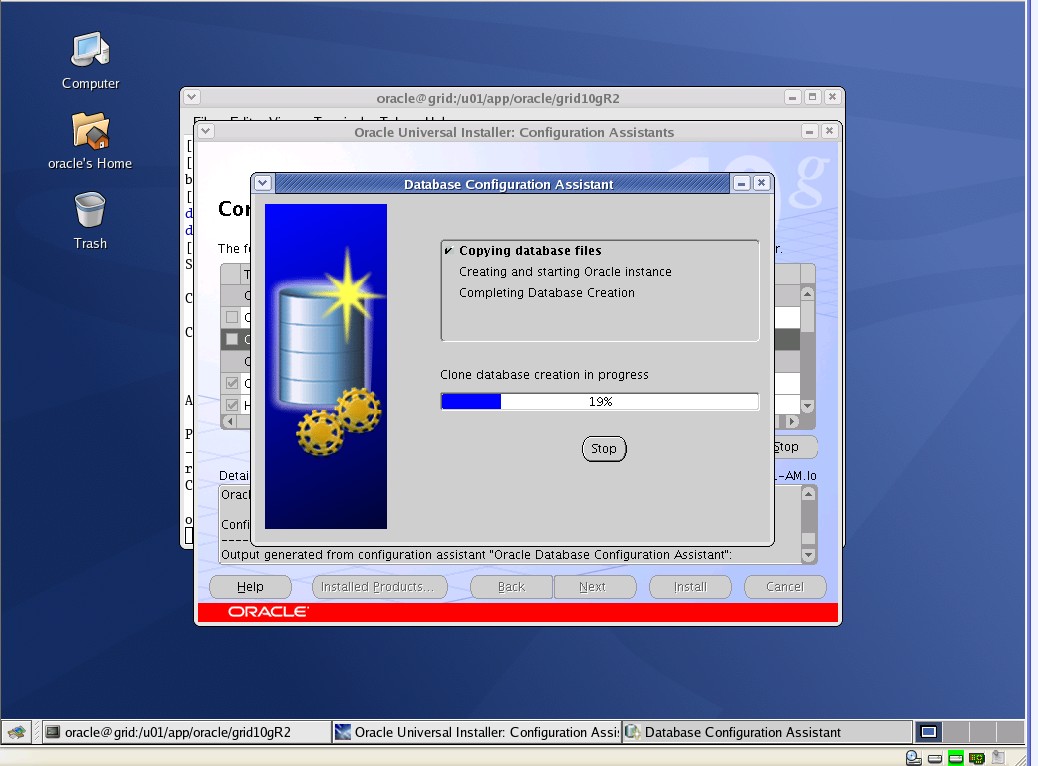
12. Configuration Assistants
사용자 개입 없이 Configuration Assistants의 작업이 성공적으로 완료될 것입니다.
13. DBCA
12번에서 기다리시면 사용자 개입 없이 DBCA를 수행합니다
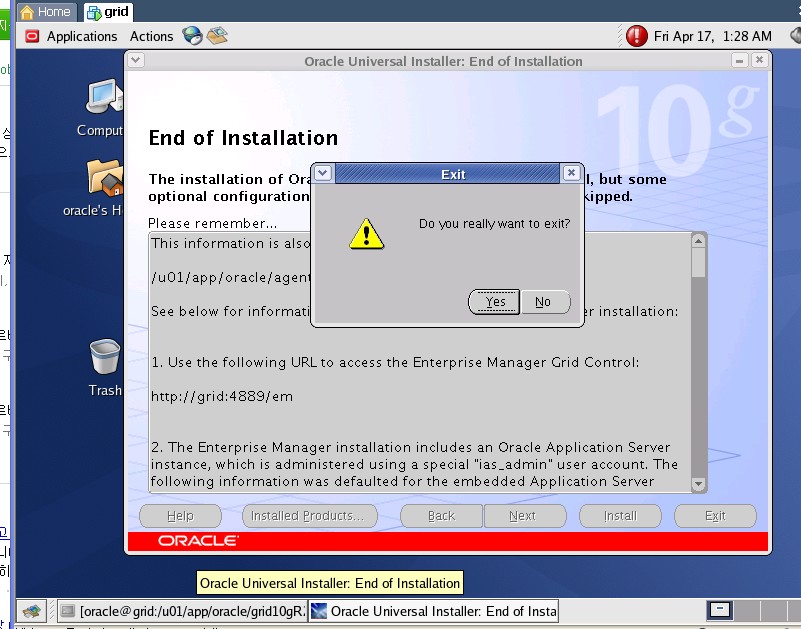
14. End of Installation
Summary 화면에 표시된 URL들을 따로 기록해 둔 후 Exit를 클릭합니다.
이것으로 Oracle Enterprise Manager Grid Control 10g Release 2 소프트웨어의 설치를 완료했습니다.
이제 OEM Grid Control 10g Release 3으로의 업그레이드를 수행할 차례입니다.
